
Our Nespresso Vertuo machine is now 10 years old. The coffee is still tasting good, but the machine was getting extremely loud when brewing. It sounded like there was a grinding noise coming from the inside. And the decibel level was getting as loud as our Vitamix. We feared that this might be the end of our Nespresso machine.
After some reading, we discovered that the loud, grinding noise might be caused by the bearing getting worn out. Simply replacing it would allow your machine to function as good as new. So we decided to do a replacement in an effort to keep our machine alive. We found the part and size we needed on Amazon and ordered for next day delivery. We chose stainless steel bearings in hopes that they would last longer and not be as prone to corrosion.

When the Nespresso bearing replacement arrived, we began the task of taking the machine apart. It's not too difficult, but it is a little involved which we will go into more detail below. We removed the old bearings, which looked pretty worn out, and swapped them with the new stainless steel version. We put everything back together and kept our fingers crossed as we tested our Vertuo with a fresh Melozio pod. We set the pod in the chamber, closed the lid and locked the machine. We pressed the button to brew, and to our surprise...it was quiet. It was so quiet that we thought something wasn't working right. But it was working perfectly. The truth is, we haven't heard the machine this quiet since it was brand new. When it finished brewing the pod, we tasted it to see if there was anything strange. There wasn't and it tasted fantastic. We were honestly stunned as we originally thought we would have to drop over $200 to get a new Vertuo machine. Instead, our old machine now functions like a new one all because we found a $6 replacement part from Amazon. Assuming everything else continues to work properly, we hope to get another 10 years out of our Nespresso machine. Below is a step by step guide to do the replacement:


Before you start, you'll need T10 and T20 torx screwdrivers to remove the screws and a flat head screw driver to help unfasten the cover and interior button housing.
First, make sure the machine is unplugged. Remove the water tank, pod tank, and drip tray. Remove the 2 screws near the back of the cover on both sides with a T20 screw driver (fig. 1). Then open the machine and remove the 2 screws located on the underside of the lid (fig. 2). Gently, pull the ears on the rear of the cover to separate from the machine. Use a flat head to help pry the cover from underneath the lid on both sides (fig. 3). It should make a clicking sound when it pops out and the cover should detach without too much trouble.
Next, remove the small spring that's hooked onto the button housing. Then remove the 2 larger springs on each side. Remove the black rubber hose guard and set it aside. Take the flat head and press down on notch of the button housing. There's a spot to press down on both ends of the white plastic housing (fig. 4). Carefully move it out of the way and let it hang by the attached cables. Then remove the 4 screws with the T10 screwdriver (fig. 5). The top will pop off and reveal the hose insertion. Carefully remove the hose and be sure not to let the small metal pipe fall out or you'll have a hard time lining it up properly and could cause the water to leak.

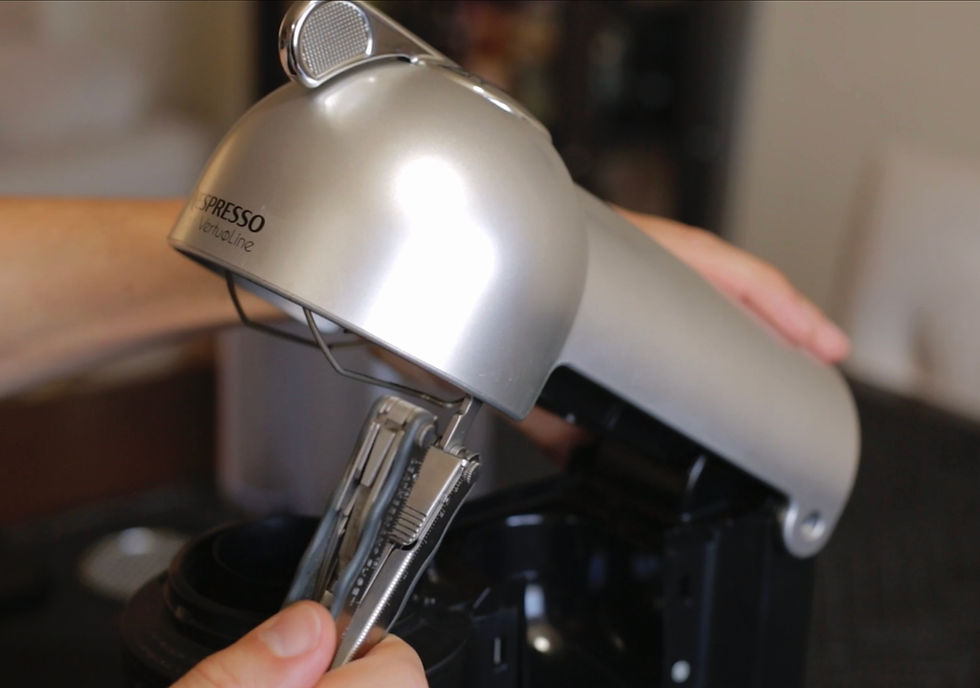
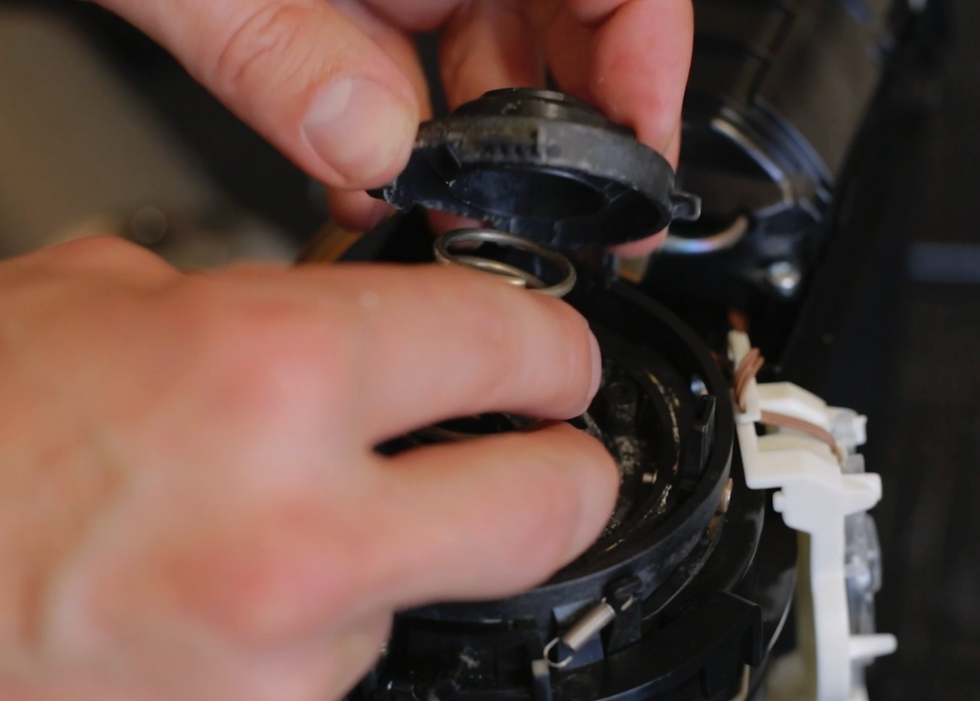
Next, press down on the top seal and rotate it counter clockwise. There is a tension spring underneath so be careful when rotating as it will pop out with some force (fig. 6). Set the seal and spring aside. Open the lid by pulling the spring that's located by the hose towards the front of the machine. With the lid open, use one hand to grab and hold the pod piercer from underneath and the other hand to rotate the plastic pin counter

clockwise (fig. 7). Remove both the pin and the bottom part from underneath. This will reveal the bearing. Press your finger from underneath to pop out the bearing and a plastic bit that keeps it In place. Swap out the old one for the new one and put it back in the hole. Start putting everything back together and fasten the screws and attach the springs.

Just before you reattach the cover, lock the machine by pulling the pins in the rotating mechanism to the locked position. This will allow you to line up the cover and put it on a lot easier. On the cover, leave the lever in the locked position. Line up the ears in the back where the screw holes are located and gently press down on the cover until you hear everything snap into place. You can test the lever to see if it's attached properly. If everything looks good, attach the screws in the back of the machine.
Open the lid and fasten the last 2 screws underneath. Put back the water tank, pod tank and drip tray. Plug in the Vertuo and fill up the water tank. Grab your favorite vertuo pod and enjoy your freshly brewed coffee in a much more quiet environment. We hope this walkthrough will help you in the event that you need to do a bearing replacement on your Nespresso Vertuo machine. The noise should be greatly reduced and allow the machine to function properly.
DISCLOSURE: This site contains affiliate links, meaning we get a commission if you decide to make a purchase through the included links, at no cost to you.
Comments